Client Manual
Introduction
Excalibur utilizes the mobile phone to act as a secure hardware token for any and all authentication and authorization needs inside of the enterprise. The ultimate goal is to move all forms of authentication and authorization away from passwords, replace them seamlessly with smartphone-based strong but user friendly multi-factor authentication. Excalibur's unique value is in providing backward compatibility with all the applications, Operating Systems (OS) and services the enterprise uses today thus creating a bridge between the password-based present day and password-free future. Client - In the context of Excalibur, the client is usually a PC. The client component provides the Excalibur login screen that is displayed on top of the default Operating System login screen / lock screen. This is achieved utilizing the Excalibur Credential Provider
Excalibur Client Installation
Installation requirements
- OS: Windows 7 with Service Pack 1 (SP1) or higher
- RAM: min 1GB for 32bit version, 2GB for 64bit version
- HDD: 20MB disk space + log files (depends on usage & debug level)
- Internet Explorer 9 or higher installed
Installation steps
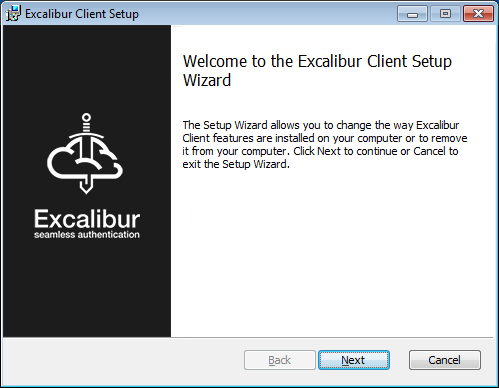
Installation packages are released in 32 and 64 bit versions. Both versions are available in the Excalibur CRM System. Download the required installation package, launch it and follow the steps. If needed, provide elevated credentials when the system asks you.
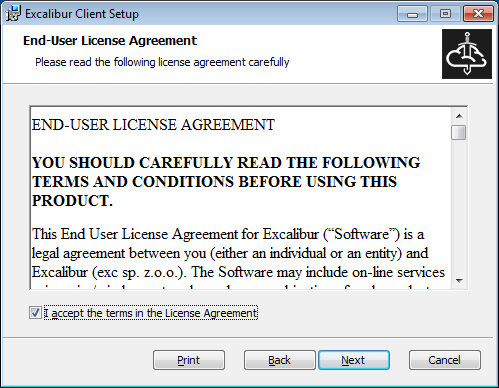
Accept terms and click on the Next button
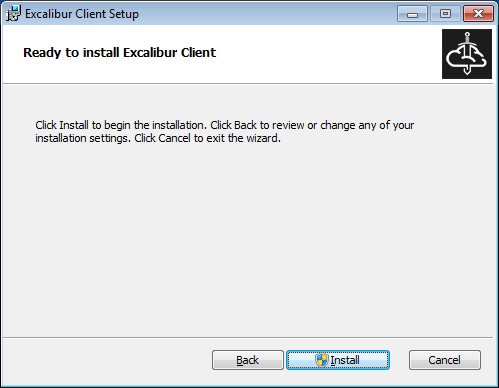

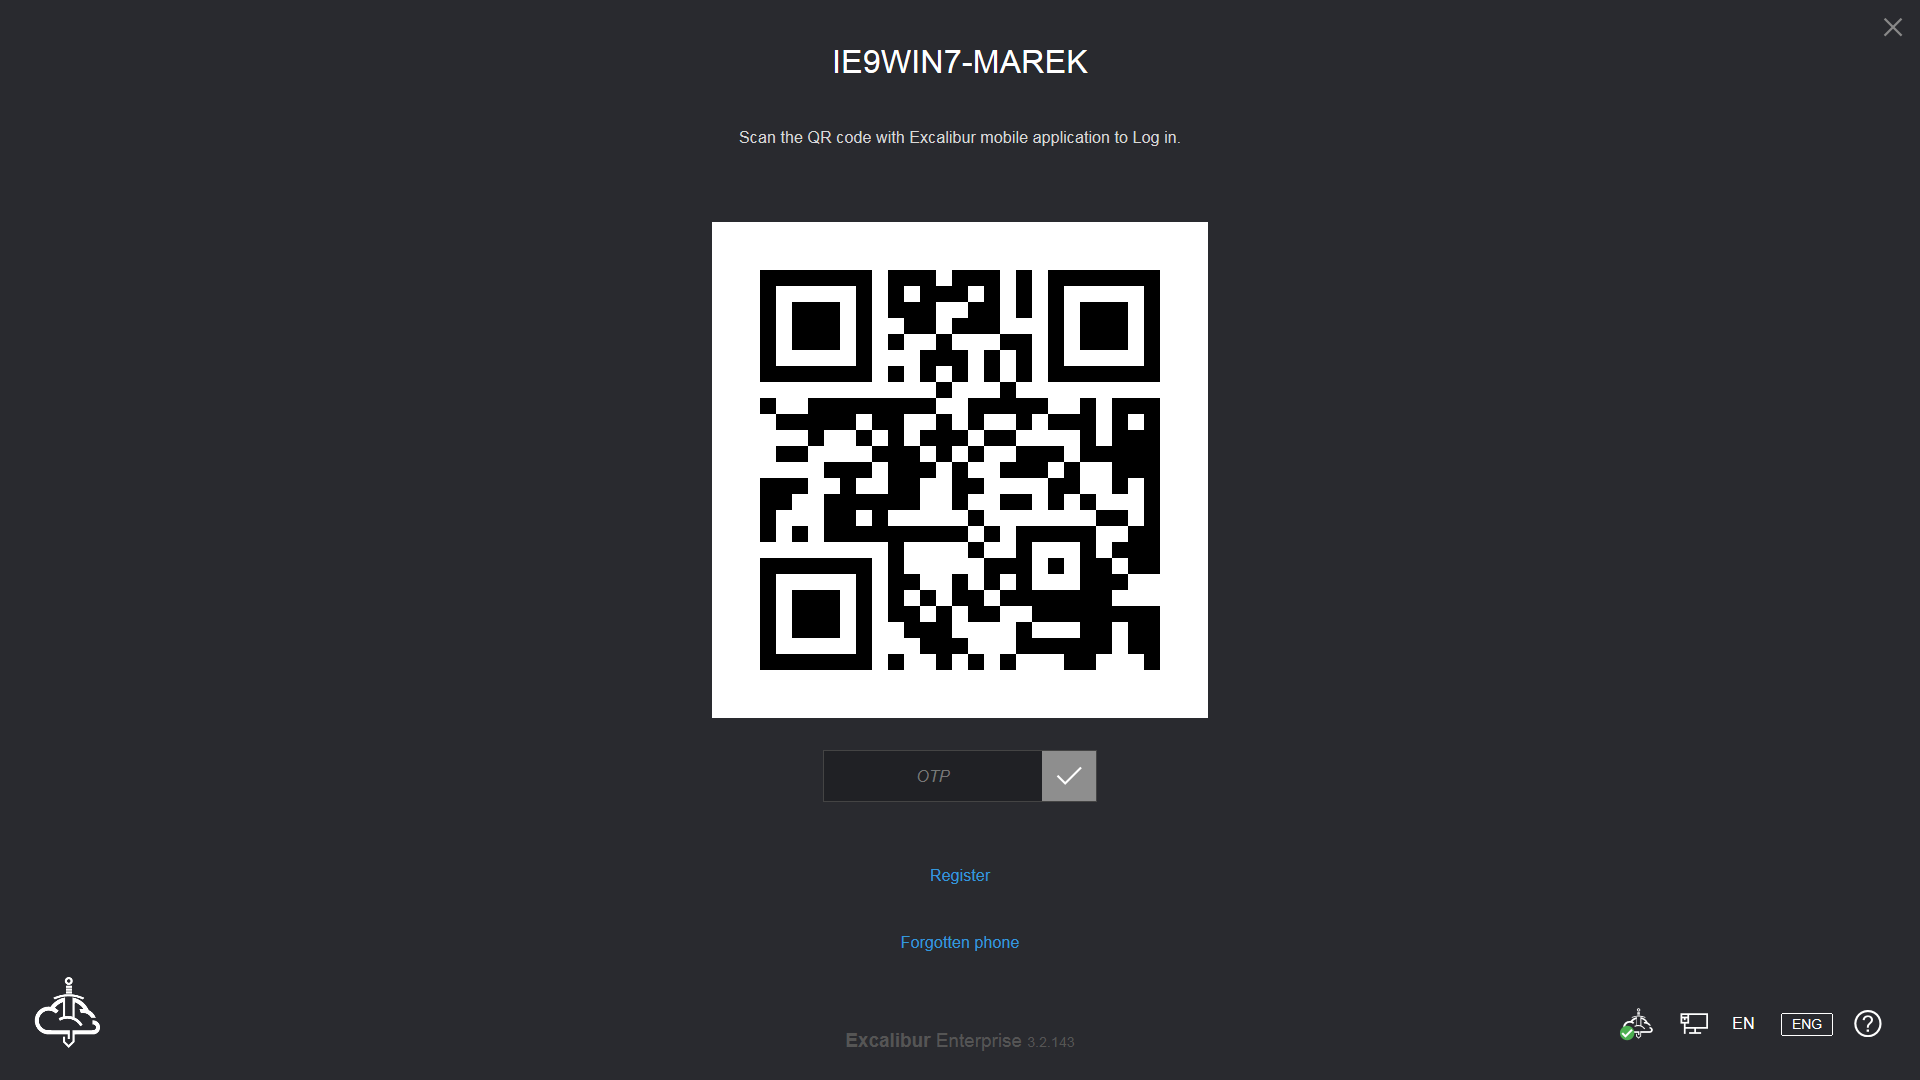
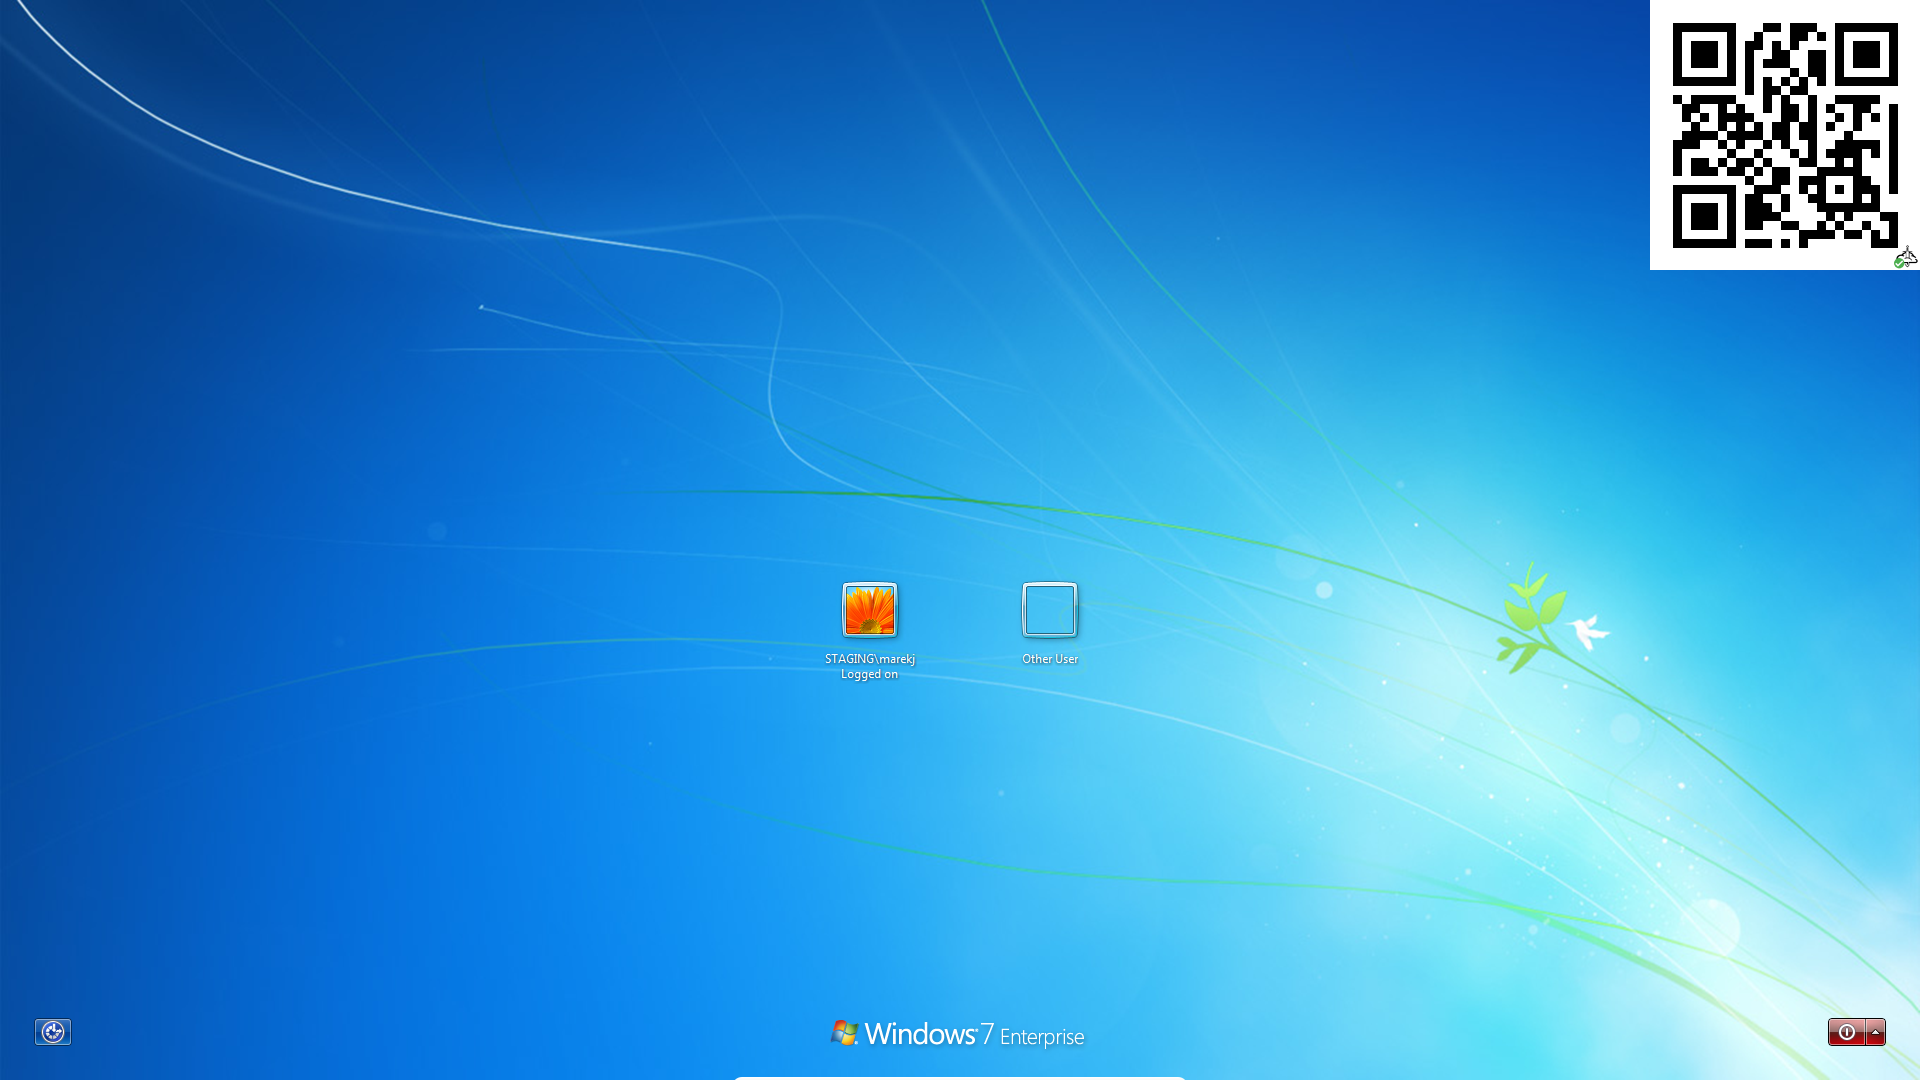
When installation was successful click on the Finish button and you will be redirected to Excalibur YouTube channel. Now, Excalibur is prepared for use. Lock or Log Out the computer, the Excalibur CPUI should be shown. Excalibur CPUI can be shown in fullscreen mode or minimal mode. To minimize CPUI, click on “X” button. In some cases is necessary to hold the click on “X” button to minimize it. y clicking on the QR code in minimal mode, the CPUI is maximized. If the Excalibur CPUI is not shown, reboot your system. If the problem persists, contact support and report a problem.
How to update Excalibur Client
When a new version of Excalibur Client is available, it is recommended to upgrade the old version to the new version. Upgrading may solve issues /if were found/, ability, speed, etc. Before installation is not necessary to stop the Excalibur Client process or uninstall Excalibur Client. Just reinstall Excalibur Client.
How to uninstall Excalibur Client
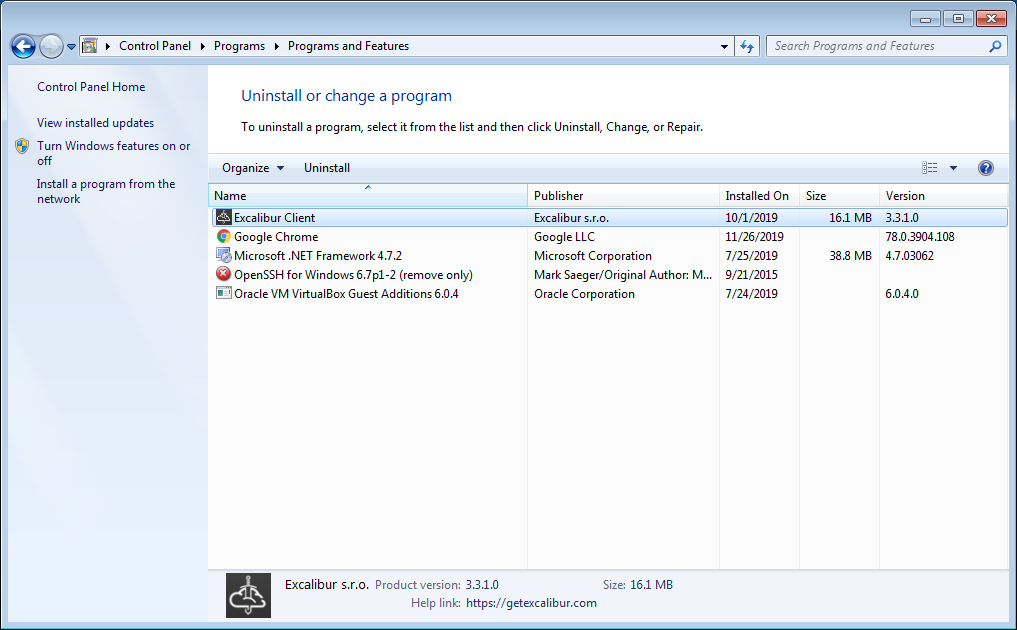
To uninstall Excalibur client there is no special step. Go to Apps / Programs in your system and uninstall client by clicking on them and confirm uninstall.
Windows Hello Biometrics and Autologon after update or restart
If you wish to use Excalibur as main MFA tool, please disable MS Windows Hello and Autologon after update or restart on your computer/policy.
How to disable Windows Hello Biometrics in Settings
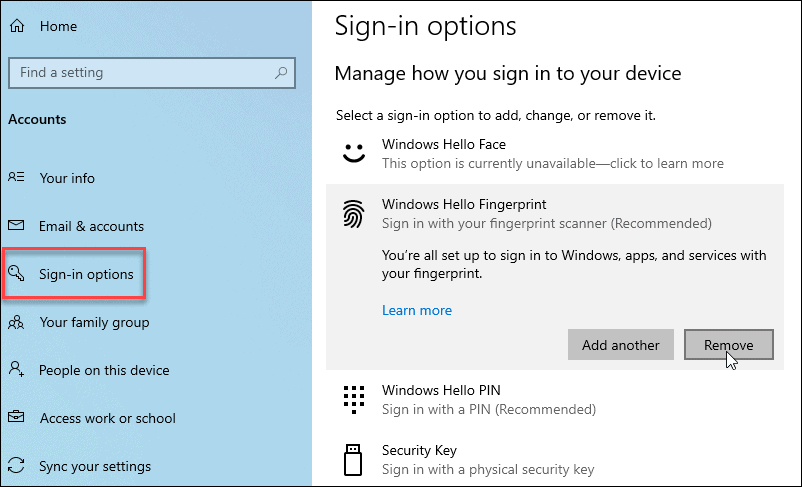
Open the Settings menu (or simply type Windows key + I). Go to Accounts > Sign-in options and disable Windows Hello.
How to disable Windows Hello Biometrics in Local Group Policy Editor
Attention
The Local Group Policy Editor is only available in the Windows 10 Pro, Enterprise, and Education editions.
- Open the Local Group Policy Editor.
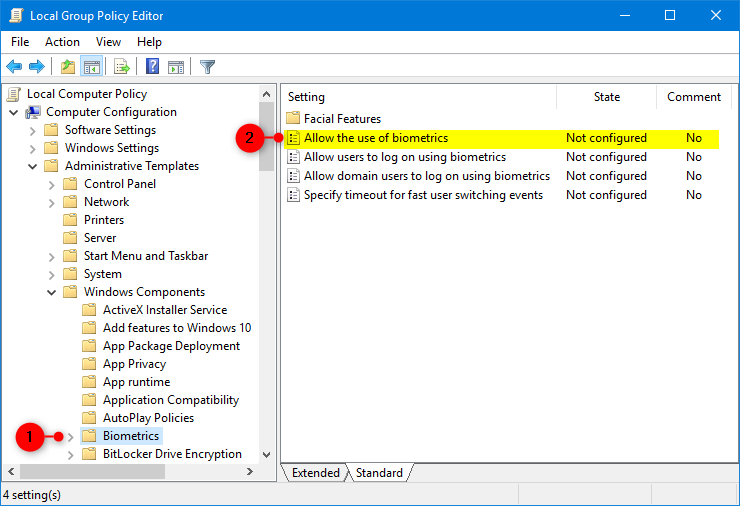
- In the left panel of Local Group Policy Editor, navigate to the location: Computer Configuraion > Windows Components > Biometrics.
- In the right panel of Biometrics in Local Group Policy Editor, double click/tap on the Allow the use of biometrics policy to edit it.
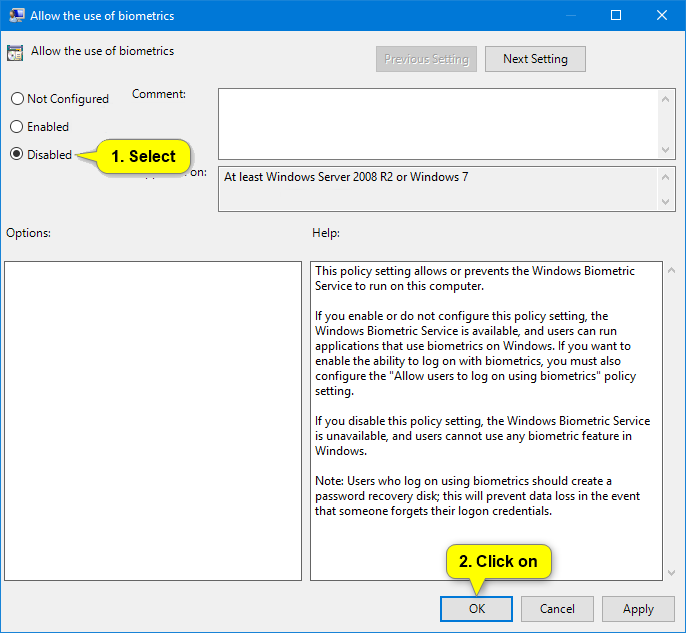
- To Disable Use of Windows Hello Biometrics, select (dot) Disabled, click/tap on OK.
- When finished, you can close the Local Group Policy Editor.
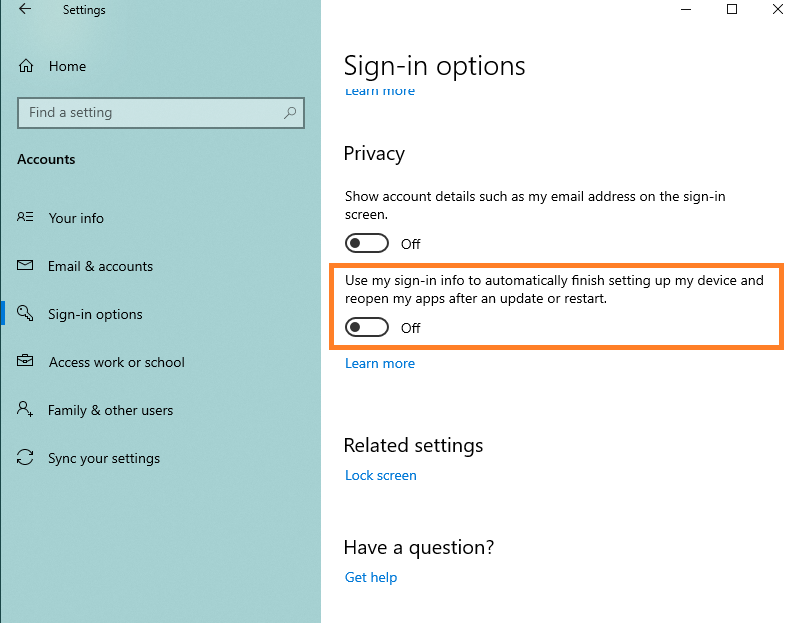
How to disable Autologon after update or restart in Settings
Open the Settings menu (or simply type Windows key + I). Go to Accounts > Sign-in options and disable it as is shown on image.
How to disable Autologon after update and reboot in Local Group Policy Editor
If You do not see option in Settings, use the Local Group Policy Editor.
Attention
The Local Group Policy Editor is only available in the Windows 10 Pro, Enterprise, and Education editions.
- Open the Local Group Policy Editor.
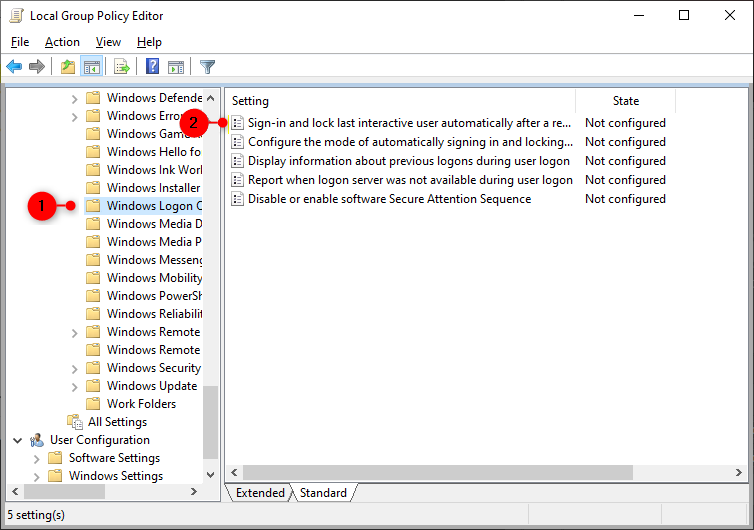
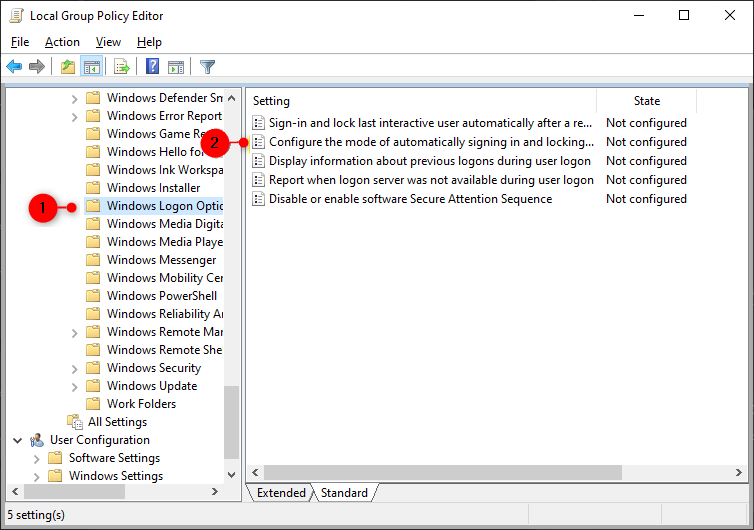
- In the left panel of Local Group Policy Editor, navigate to the location : Computer Configuraion > Windows Components > Windows Logon Options.
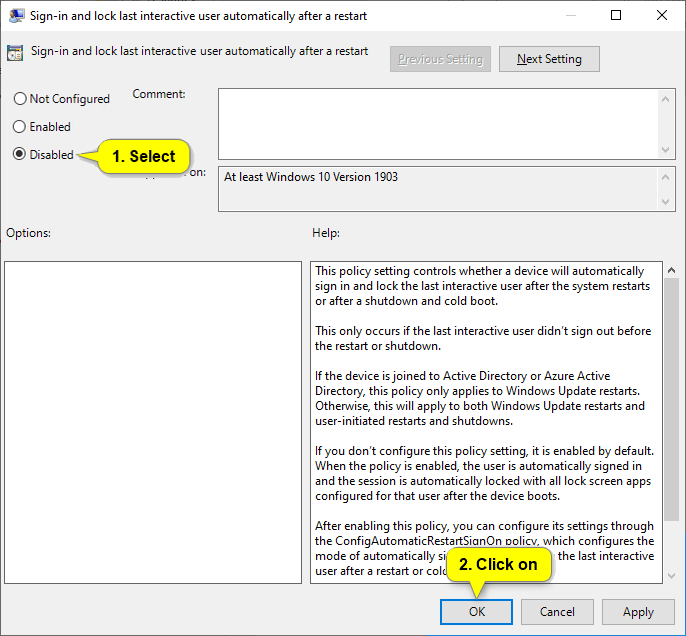
- In the right panel of Windows Logon Options in Local Group Policy Editor, double click/tap on the Sign-in and lock last interactive user automatically after a system-initiated restart policy to edit it.
- To Disable Use of Autologon after update and reboot, select (dot) Disabled, click/tap on OK.
- When finished, you can close the Local Group Policy Editor.
- Restart computer to apply settings.
How to disable Automatically signing in and locking last interactive user after a restart or cold boot
Attention
The Local Group Policy Editor is only available in the Windows 10 Pro, Enterprise, and Education editions.
- Open the Local Group Policy Editor.
- In the left panel of Local Group Policy Editor, navigate to the location : Computer Configuraion > Windows Components > Windows Logon Options.
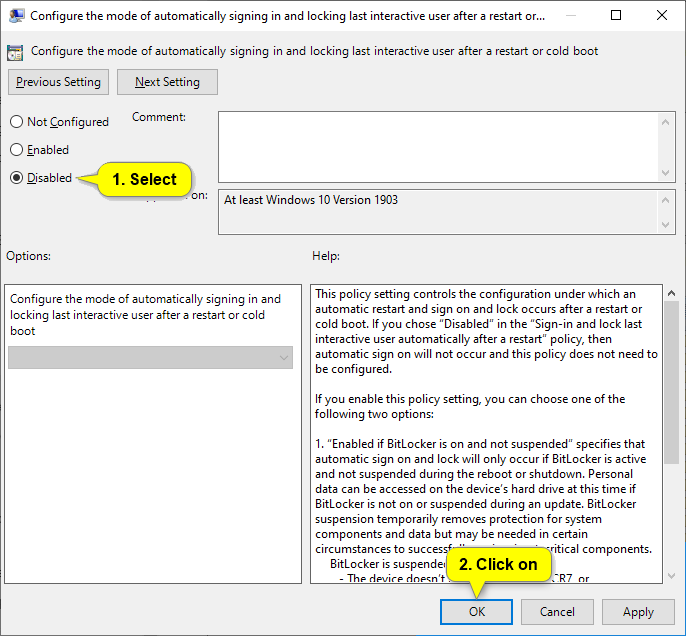
- In the right panel of Windows Logon Options in Local Group Policy Editor, double click/tap on the Configure the mode of automatically signing in and locking last interactive user after a restart or cold boot policy to edit it.
- To Disable Use of Autologon after update and reboot, select (dot) Disabled, click/tap on OK.
- When finished, you can close the Local Group Policy Editor.
- Restart computer to apply settings.
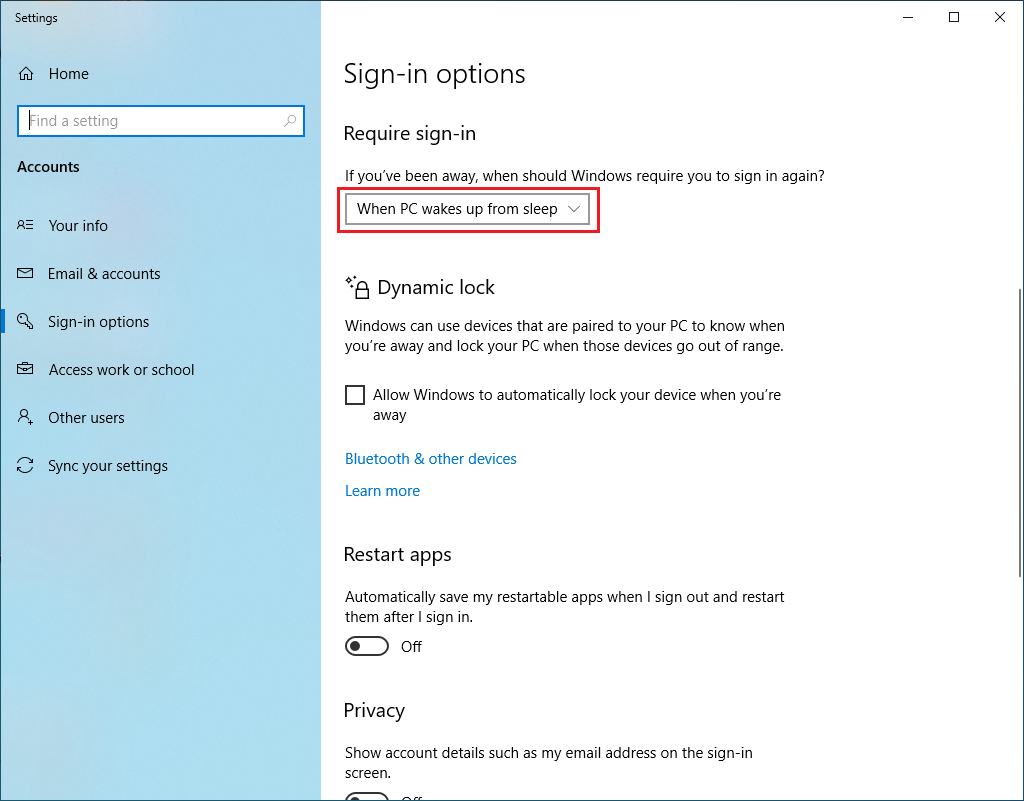
How to enable required password after sleep
Open the Settings menu (or simply type Windows key + I). Go to Accounts > Sign-in options and set : When PC wakes up from sleep.
How to enable required password after sleep in Local Group Policy Editor
Attention
The Local Group Policy Editor is only available in the Windows 10 Pro, Enterprise, and Education editions.
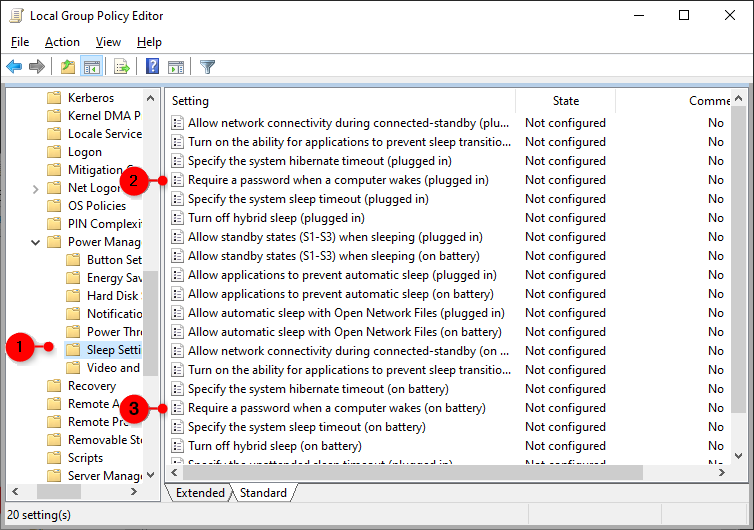
- Open the Local Group Policy Editor.
- In the left panel, navigate to Computer Configuration > Administrative Templates > System > ** Power Management** > **Sleep Setting**s.
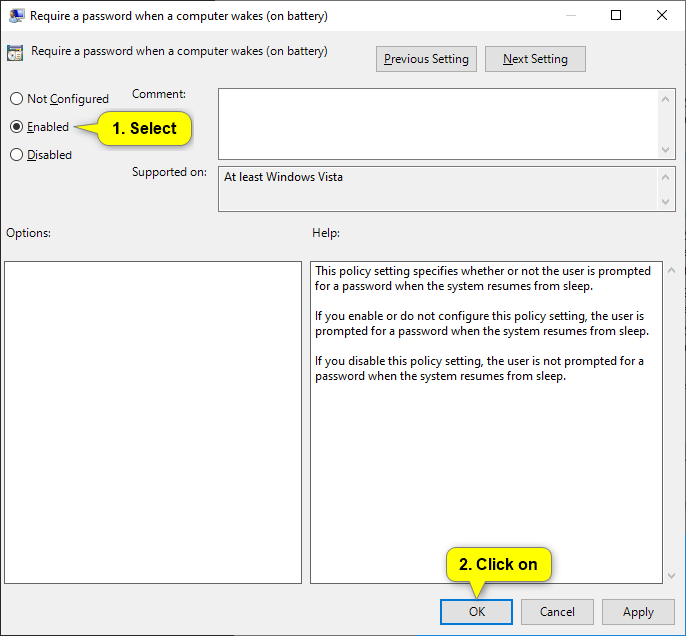
- in the right panel, you’ll see two policies labeled Require a Password when the computer wakes (plugged in) and Require a Password when the computer wakes (on battery). Double-click on them to modify and set the policies to Enabled.
- Restart your Computer

How to check port listening
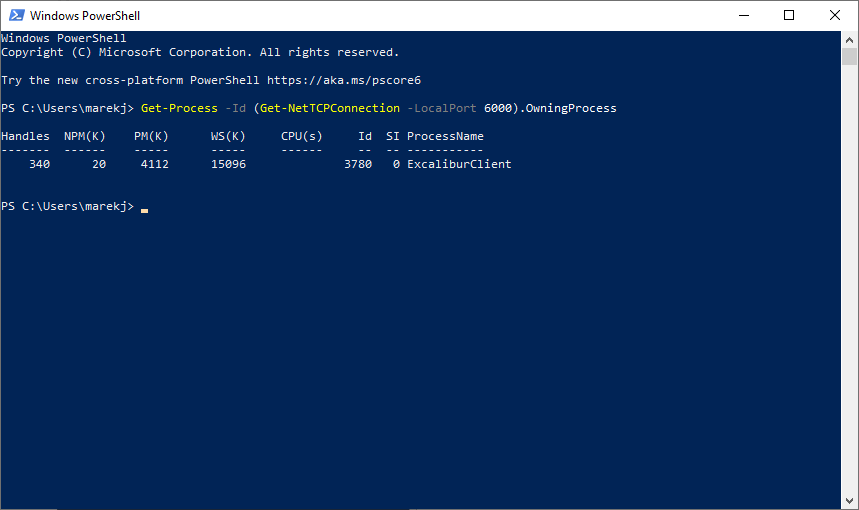
Excalibur Client should be listening on port 6000. If you have problem with connection to server, please check the port with following commands in PowerShell command prompt.
Test-NetConnection -Port 6000 -ComputerName 127.0.0.1
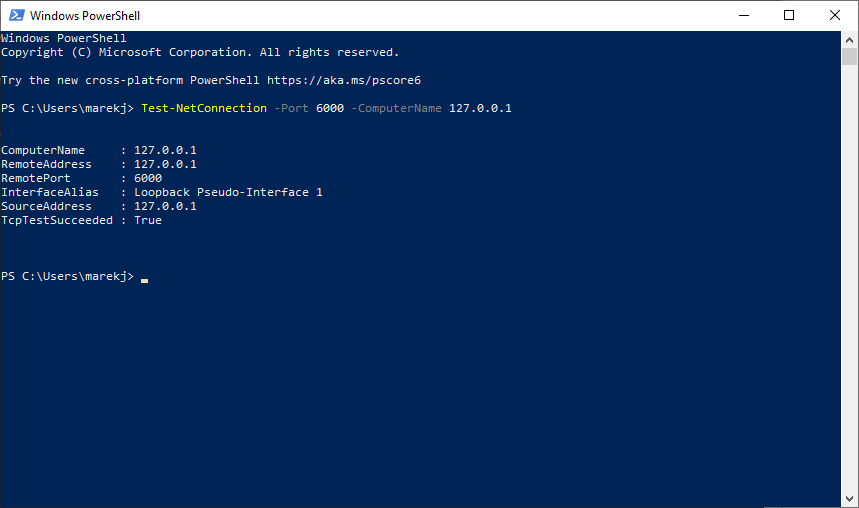
Get-Process -Id (Get-NetTCPConnection -LocalPort 6000).OwningProcess